
Sewing machines are great when they are working, but can be a headache when things go wrong. So keeping your machine in the best possible shape is very important for mental health.
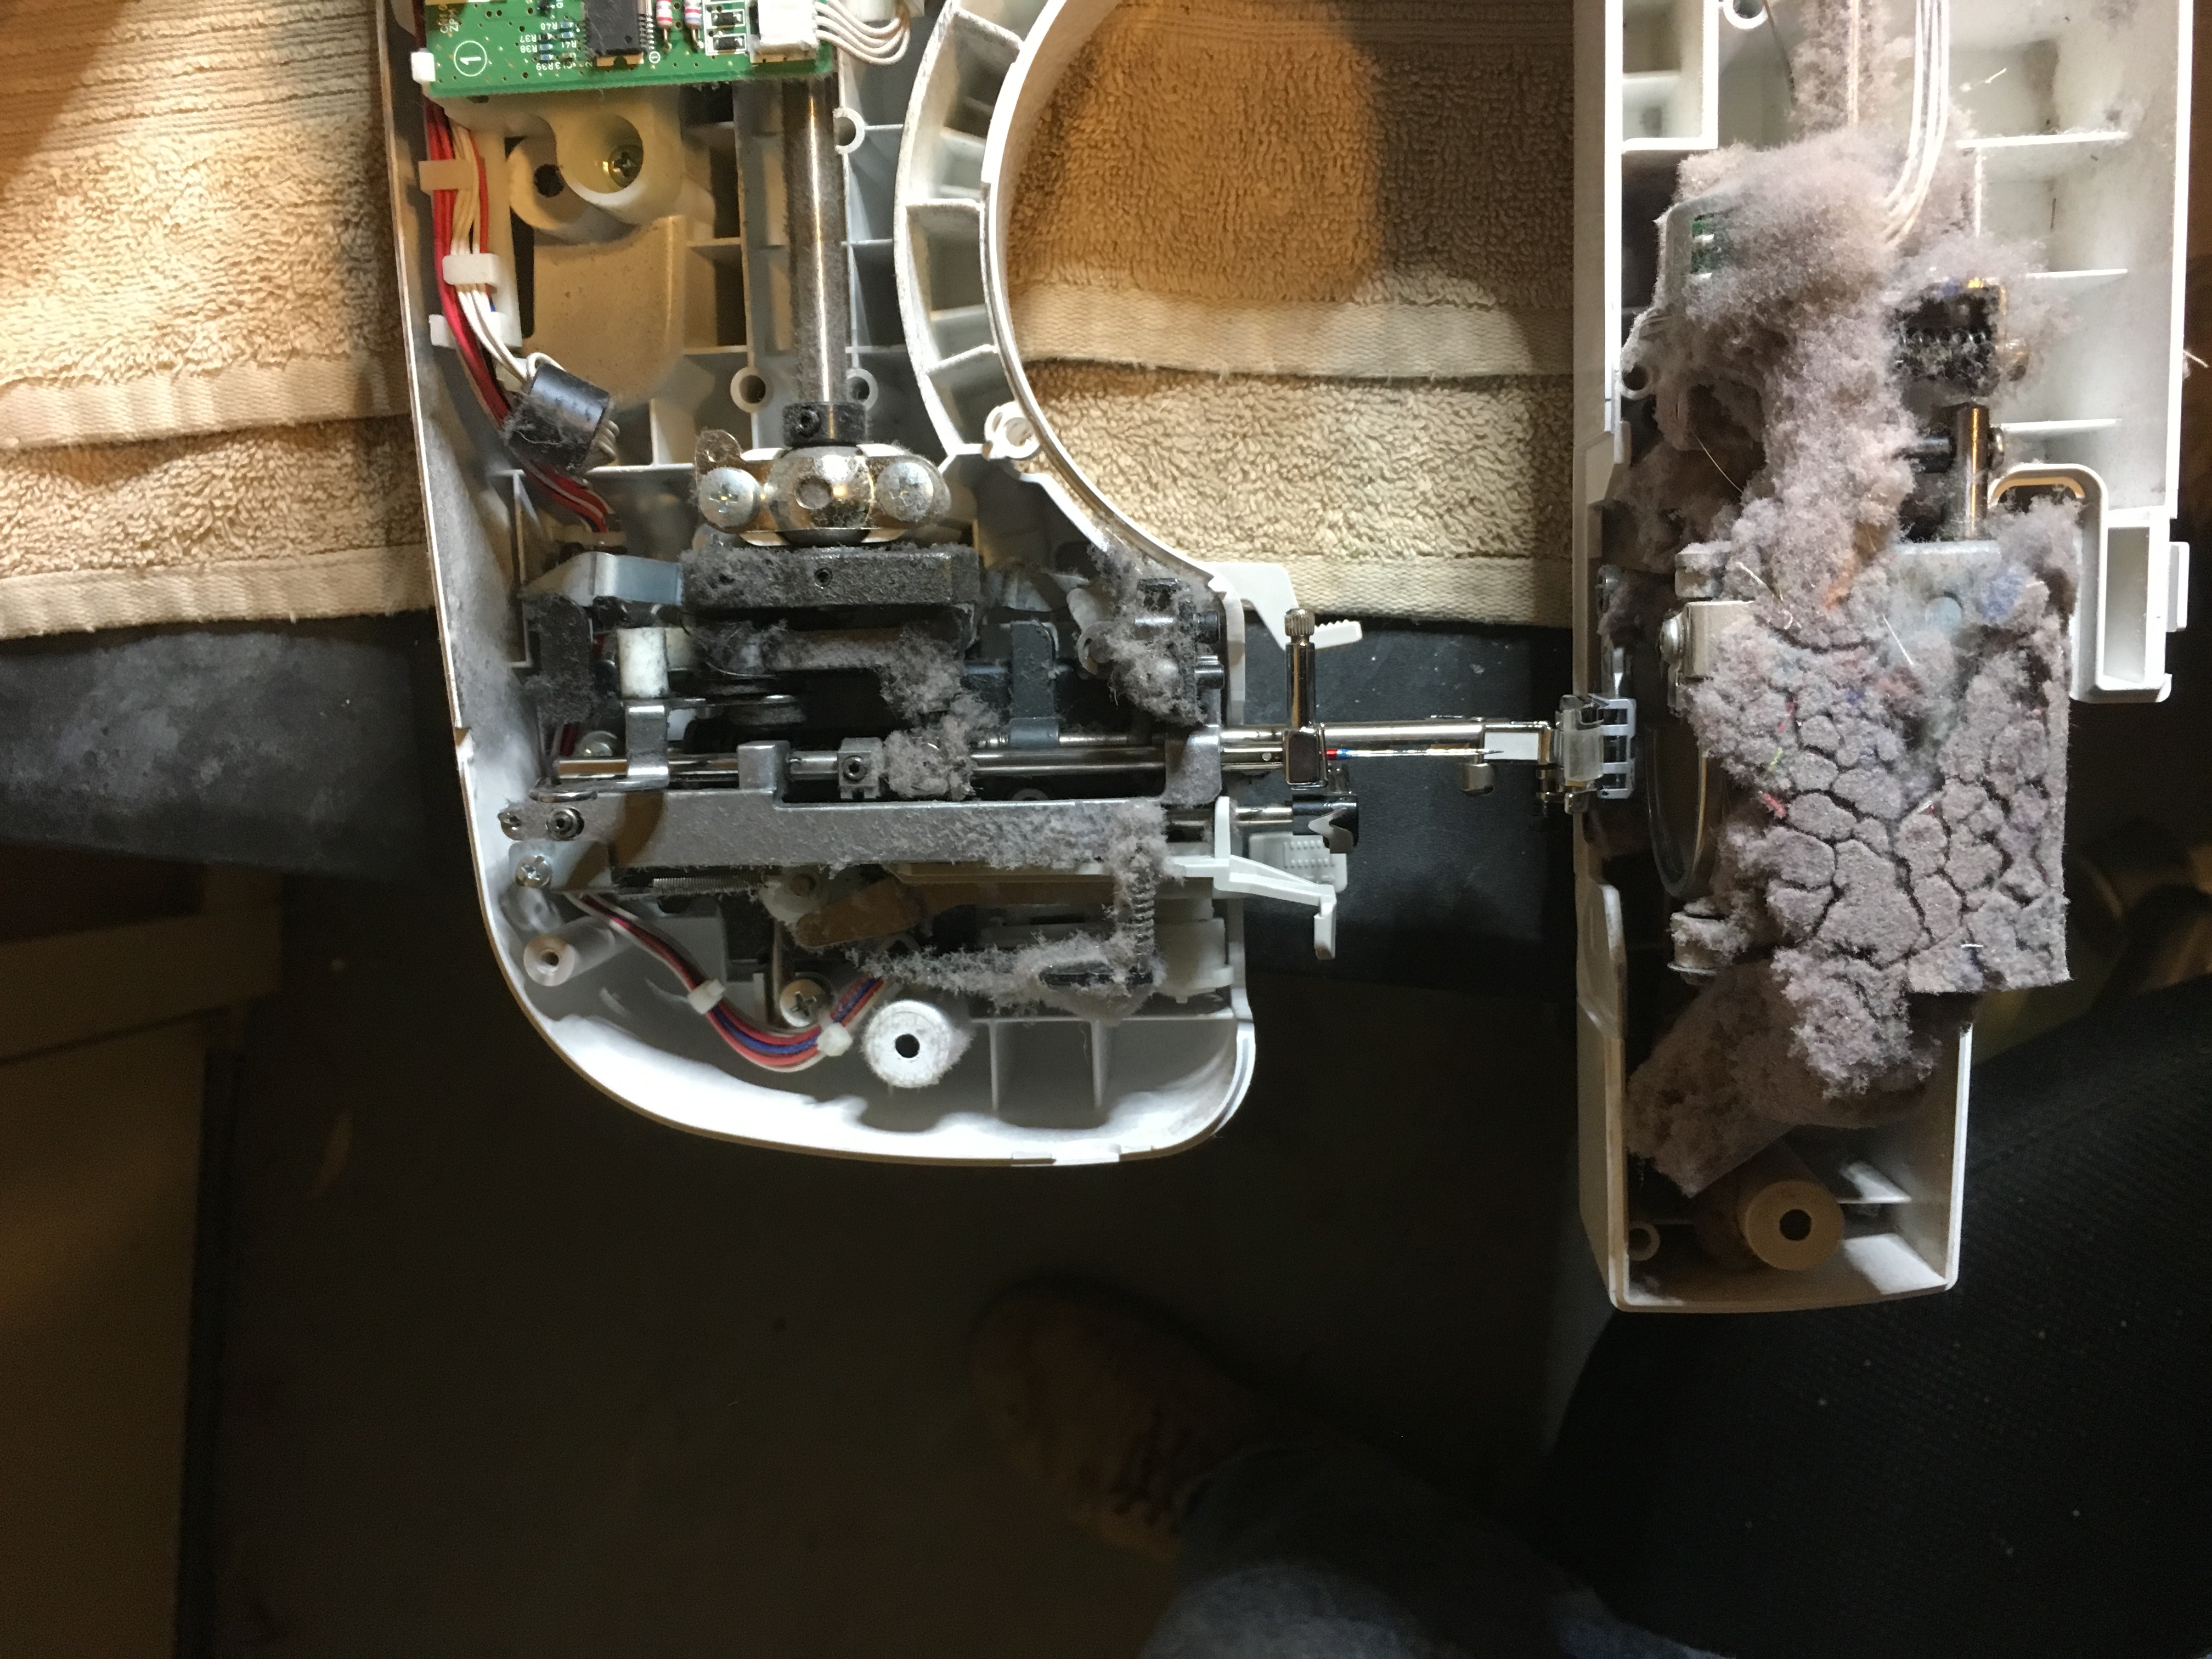
This is a Brother machine that came in to my shop. It had never been cleaned, but was heavily used. The lint destroyed this machine, it could not be repaired. Sewing machine cleaning and maintenance between services is vitally important.
Proper maintenance starts with proper use. Here are a few tips to help keep sewing machine problems from starting.
Proper needle size
The quickest way to create a need for sewing machine repair is by using the wrong size needle. My customers often ask about proper needle sizing, I recommend never using less than a size 12 needle unless your sewing very thin fabric such as one or two layers of silk or similar fabric.
Your thread needs to lay in the groove on the front of the needle so it is protected from friction as it passes through the fabric. Your needle needs to be strong enough to penetrate the thickest layers you will be sewing without bending. Your goal is to have a sewn product with nice stitches without huge holes from the needle, as long as the needle is not leaving large holes in your fabric then it is not to big. A needle that is to small even if it is only to small at the corners will have needle deflection which means the needle bends slightly when it hits the fabric then goes through at an angle.
It can skip stitches, damage the needle plate, hook and/or bobbin case. once the damage starts it will continue to get worse until your sewing machine needs repair.
You can get needles below if you need them.
Do not pull your fabric.
Pulling fabric when sewing is a bad habit. Your stitch length will be longer, your fabric can be damaged and you will probably damage your machine as the needle bends when your pulling the fabric. Let the machine feed the fabric and you guide, not pull it.
Always lift your presser foot.
When threading your machine the first step is lifting the presses foot, this small action is one of the leading causes to sewing problems. The foot is designed to open the tension discs when lifted on 90% of machines. This dates back to some of the earliest machines in the 1800's but is one of the most overlooked steps in threading a machine.
The best kept secret in sewing machine cleaning.
How to clean a sewing machine is a problem I see even with some of the most experienced seamstresses
Lint is very abrasive and destructive, if not cleaned out of a machine on a regular basis it can and will eat through not only plastic but metal parts of a sewing machine. The two biggest problems I see on a regular basis is not cleaning at all due to lack of knowledge and improperly using canned air.
Sewing machines look and operate differently between manufactures and even models, but the stitch is made the exact same way with every sewing machine. This makes cleaning and lubricating almost identical in all machines mechanically speaking, it is the outer shell or cover that makes the biggest difference in accessing cleaning and lubricating the machine.
In a general cleaning between services you are looking at only 2 places, the hook/bobbin case and the needle bar areas. In these two areas you will remove all the lint, thread and debris possible, then lubricate all parts that operate, move or rub together. As you lubricate you will turn the machine by hand, in most cases you will see small amounts of oil drenched lint start coming out, remove it if you can.
Sewing machine cleaning should be preformed every eight to ten hours of sewing, if you are sewing flannel, fleece, wool or anything thick or bulky your machine should be cleaned every three to five hours of sewing.
Sewing machine cleaning made easy in 5 simple steps
Cleaning and lubricating a machine is simple and easy so lets get started.
5 steps to success
- Open and inspect
- Remove lint and debris
- Lubricate and operate
- Repair or replace
- Reassemble
You need to prepare to clean your machine first, if this is your first time you will need room to work I recommend at least twice the size of your machine. Cover the area you plan work on your machine with a thick cloth, this will protect the area from debris, oil and grease and the machine from potential damage.
Identify the parts of the machine you will be removing and note the tools needed for removal, in most cases it will be a screw driver or two if there are 2 different head types on the screws. You will be removing or opening the needle bar cover/door if possible, the needle plate and a bottom or end cover. The cover needs to be as close as possible to the hook/bobbin case area, not all machines will have a cover that can be removed.
Recommended tools and supplies
- Screwdriver/s
- Vacuum and 8 piece micro attachment kit
- Dremel with cone shaped diamond bit
- 1000 grit sandpaper
- Canned air*
- Brush
- Oil
*Warning canned air should be used carefully and with discretion, not all machines are designed to have canned air used in cleaning them. The machine must have a cover or plate that is removable. The lint must have an exit point out of the machine, lint can cause major or non repairable damage if it is blown into the machine rather than out of a removed cover.
Open and Inspect
Remove the needle and inspect it for damage, if the tip is blunted or damaged throw it away and replace it with a new needle. Do not install the needle until the machine is cleaned and reassembled, this is for safety purposes.
??????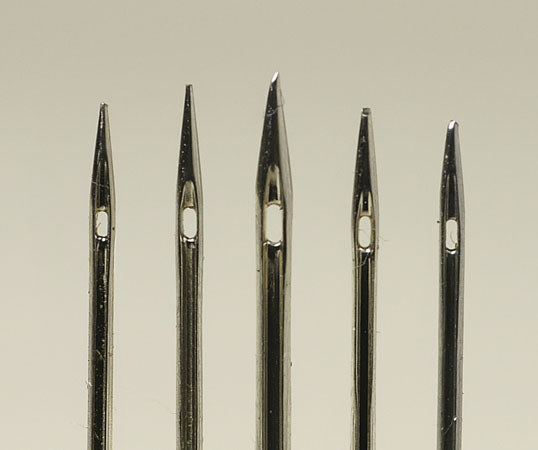
Examples of damaged needles
Open or remove the needle bar cover if applicable, inspect the cover for damage and debris. Remove the needle plate and inspect for damage from the needle, if your machine has an end or bottom cover remove it and inspect it for damage as well. Remove the bobbin case and inspect for damage from the needle or thread. On machines with front or side load bobbin cases the hook needs to be removed and inspected for damage.
????????????????????????????????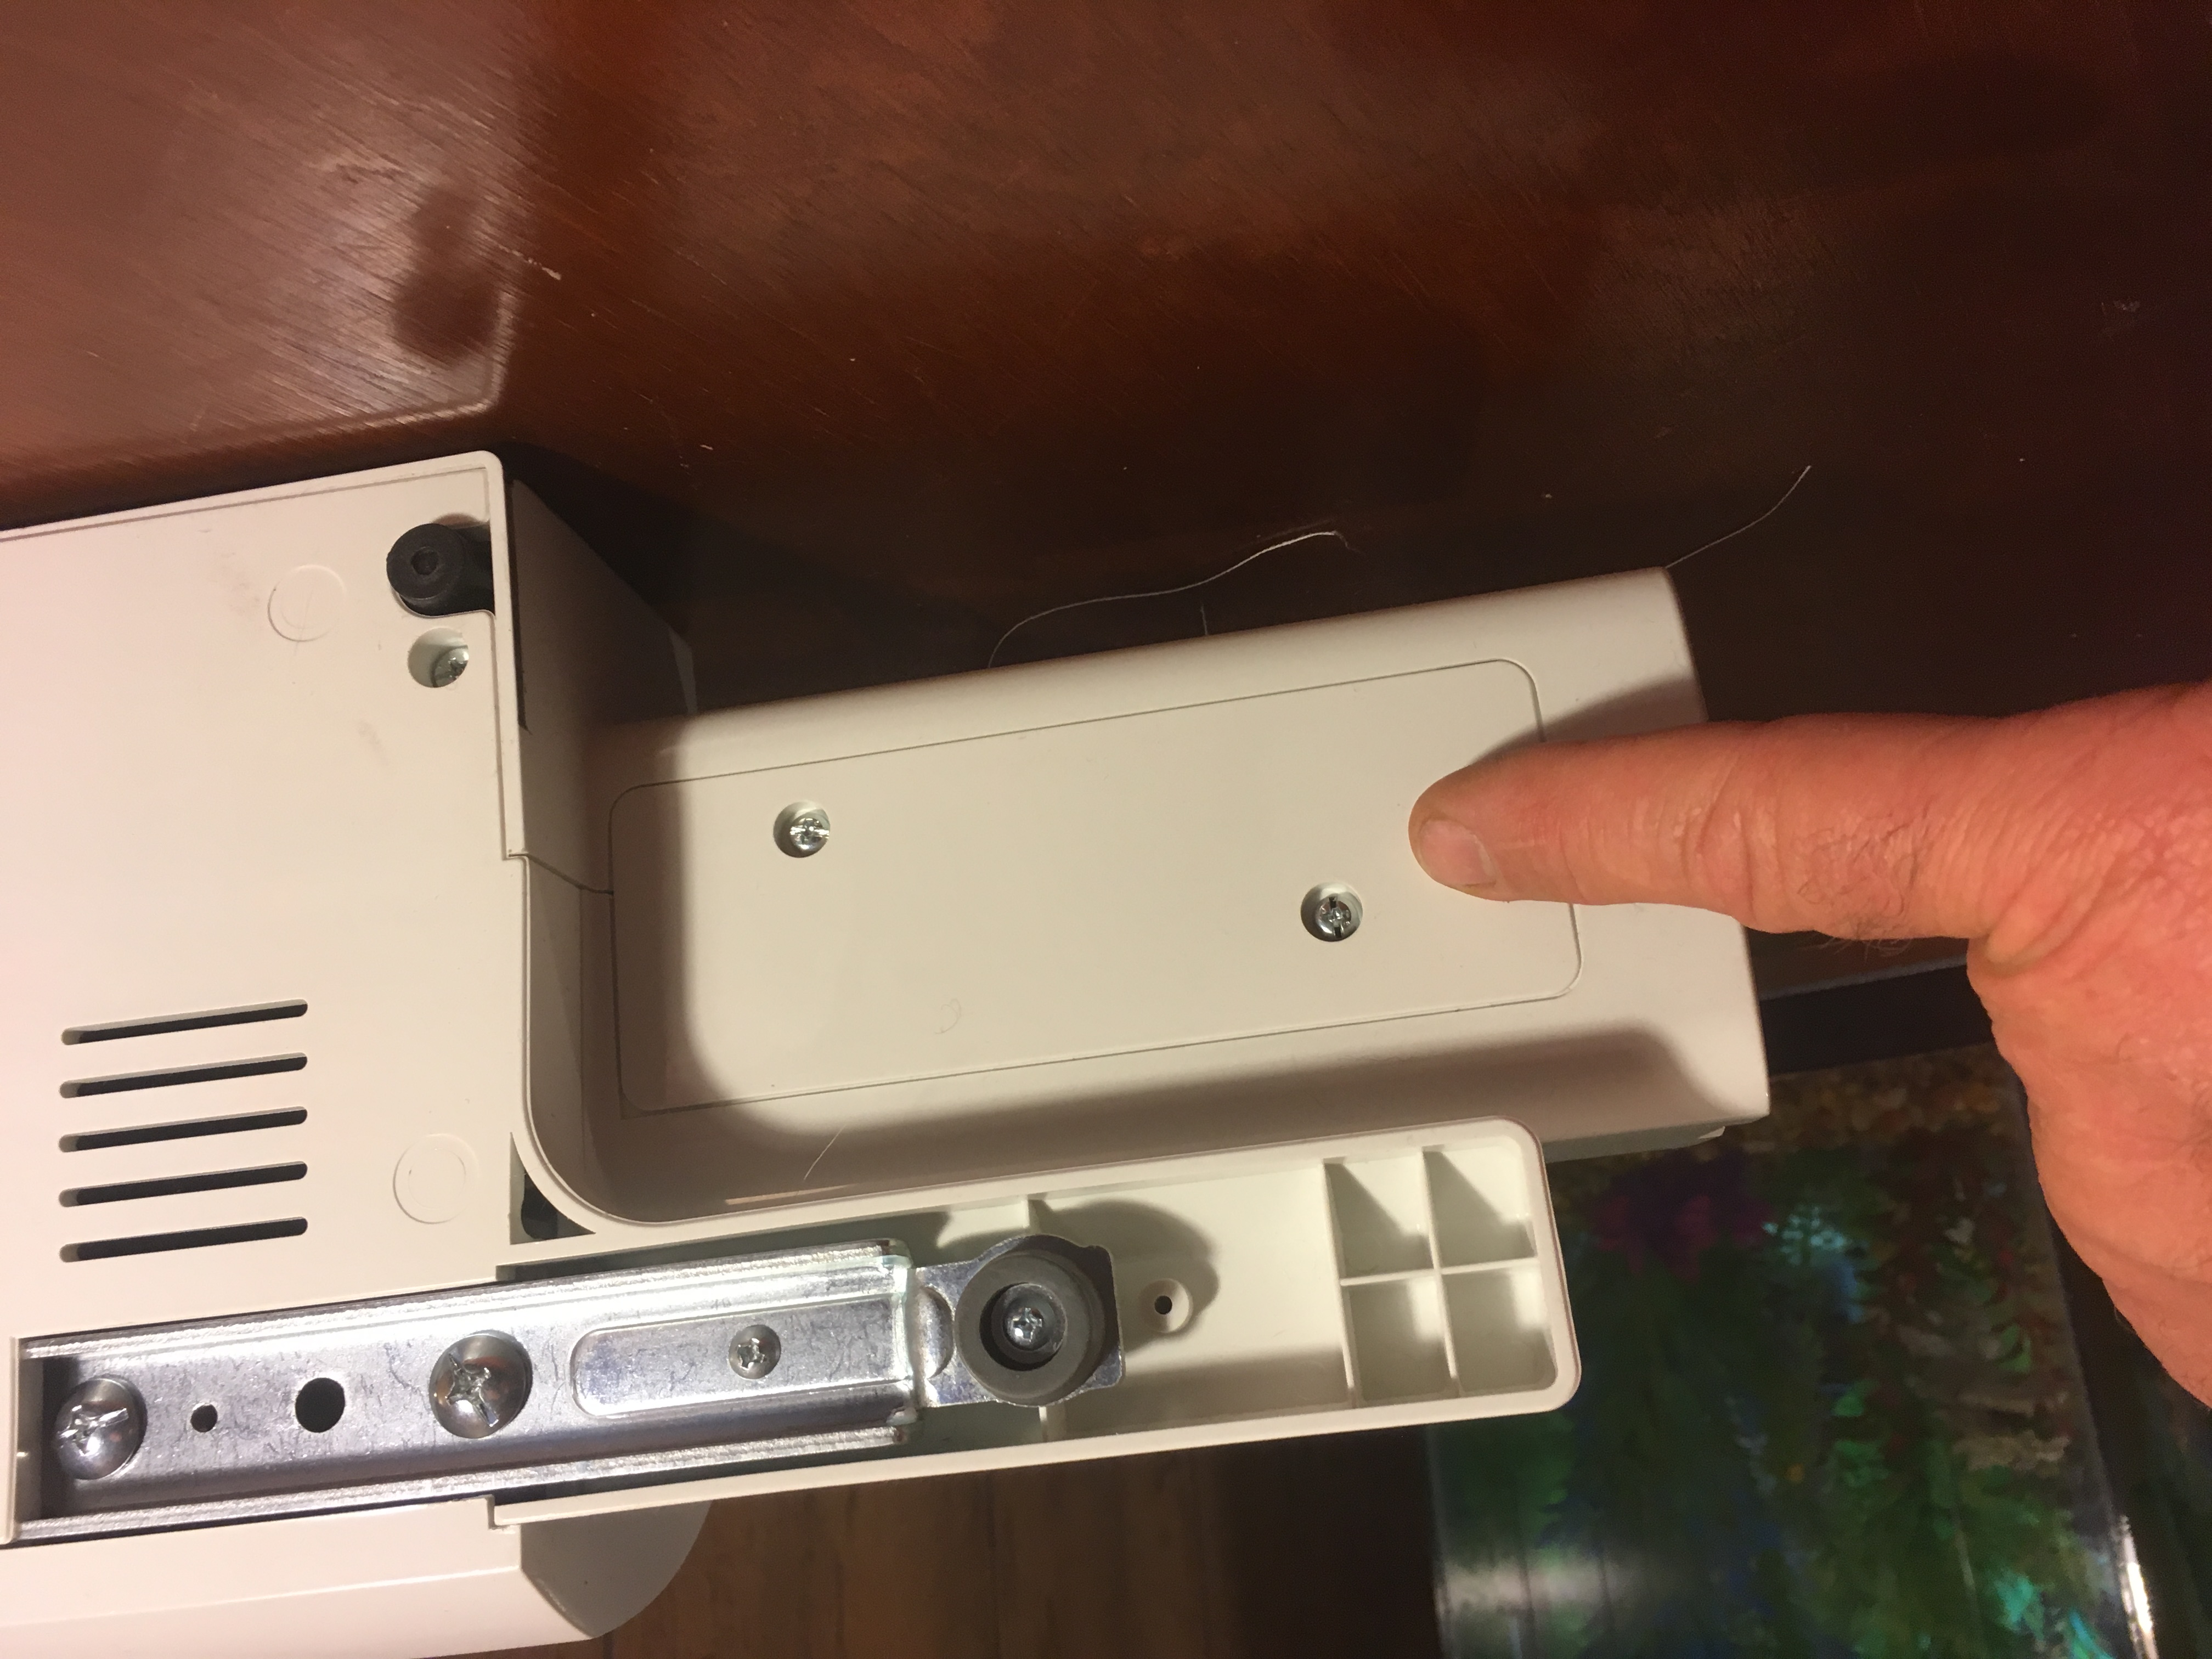
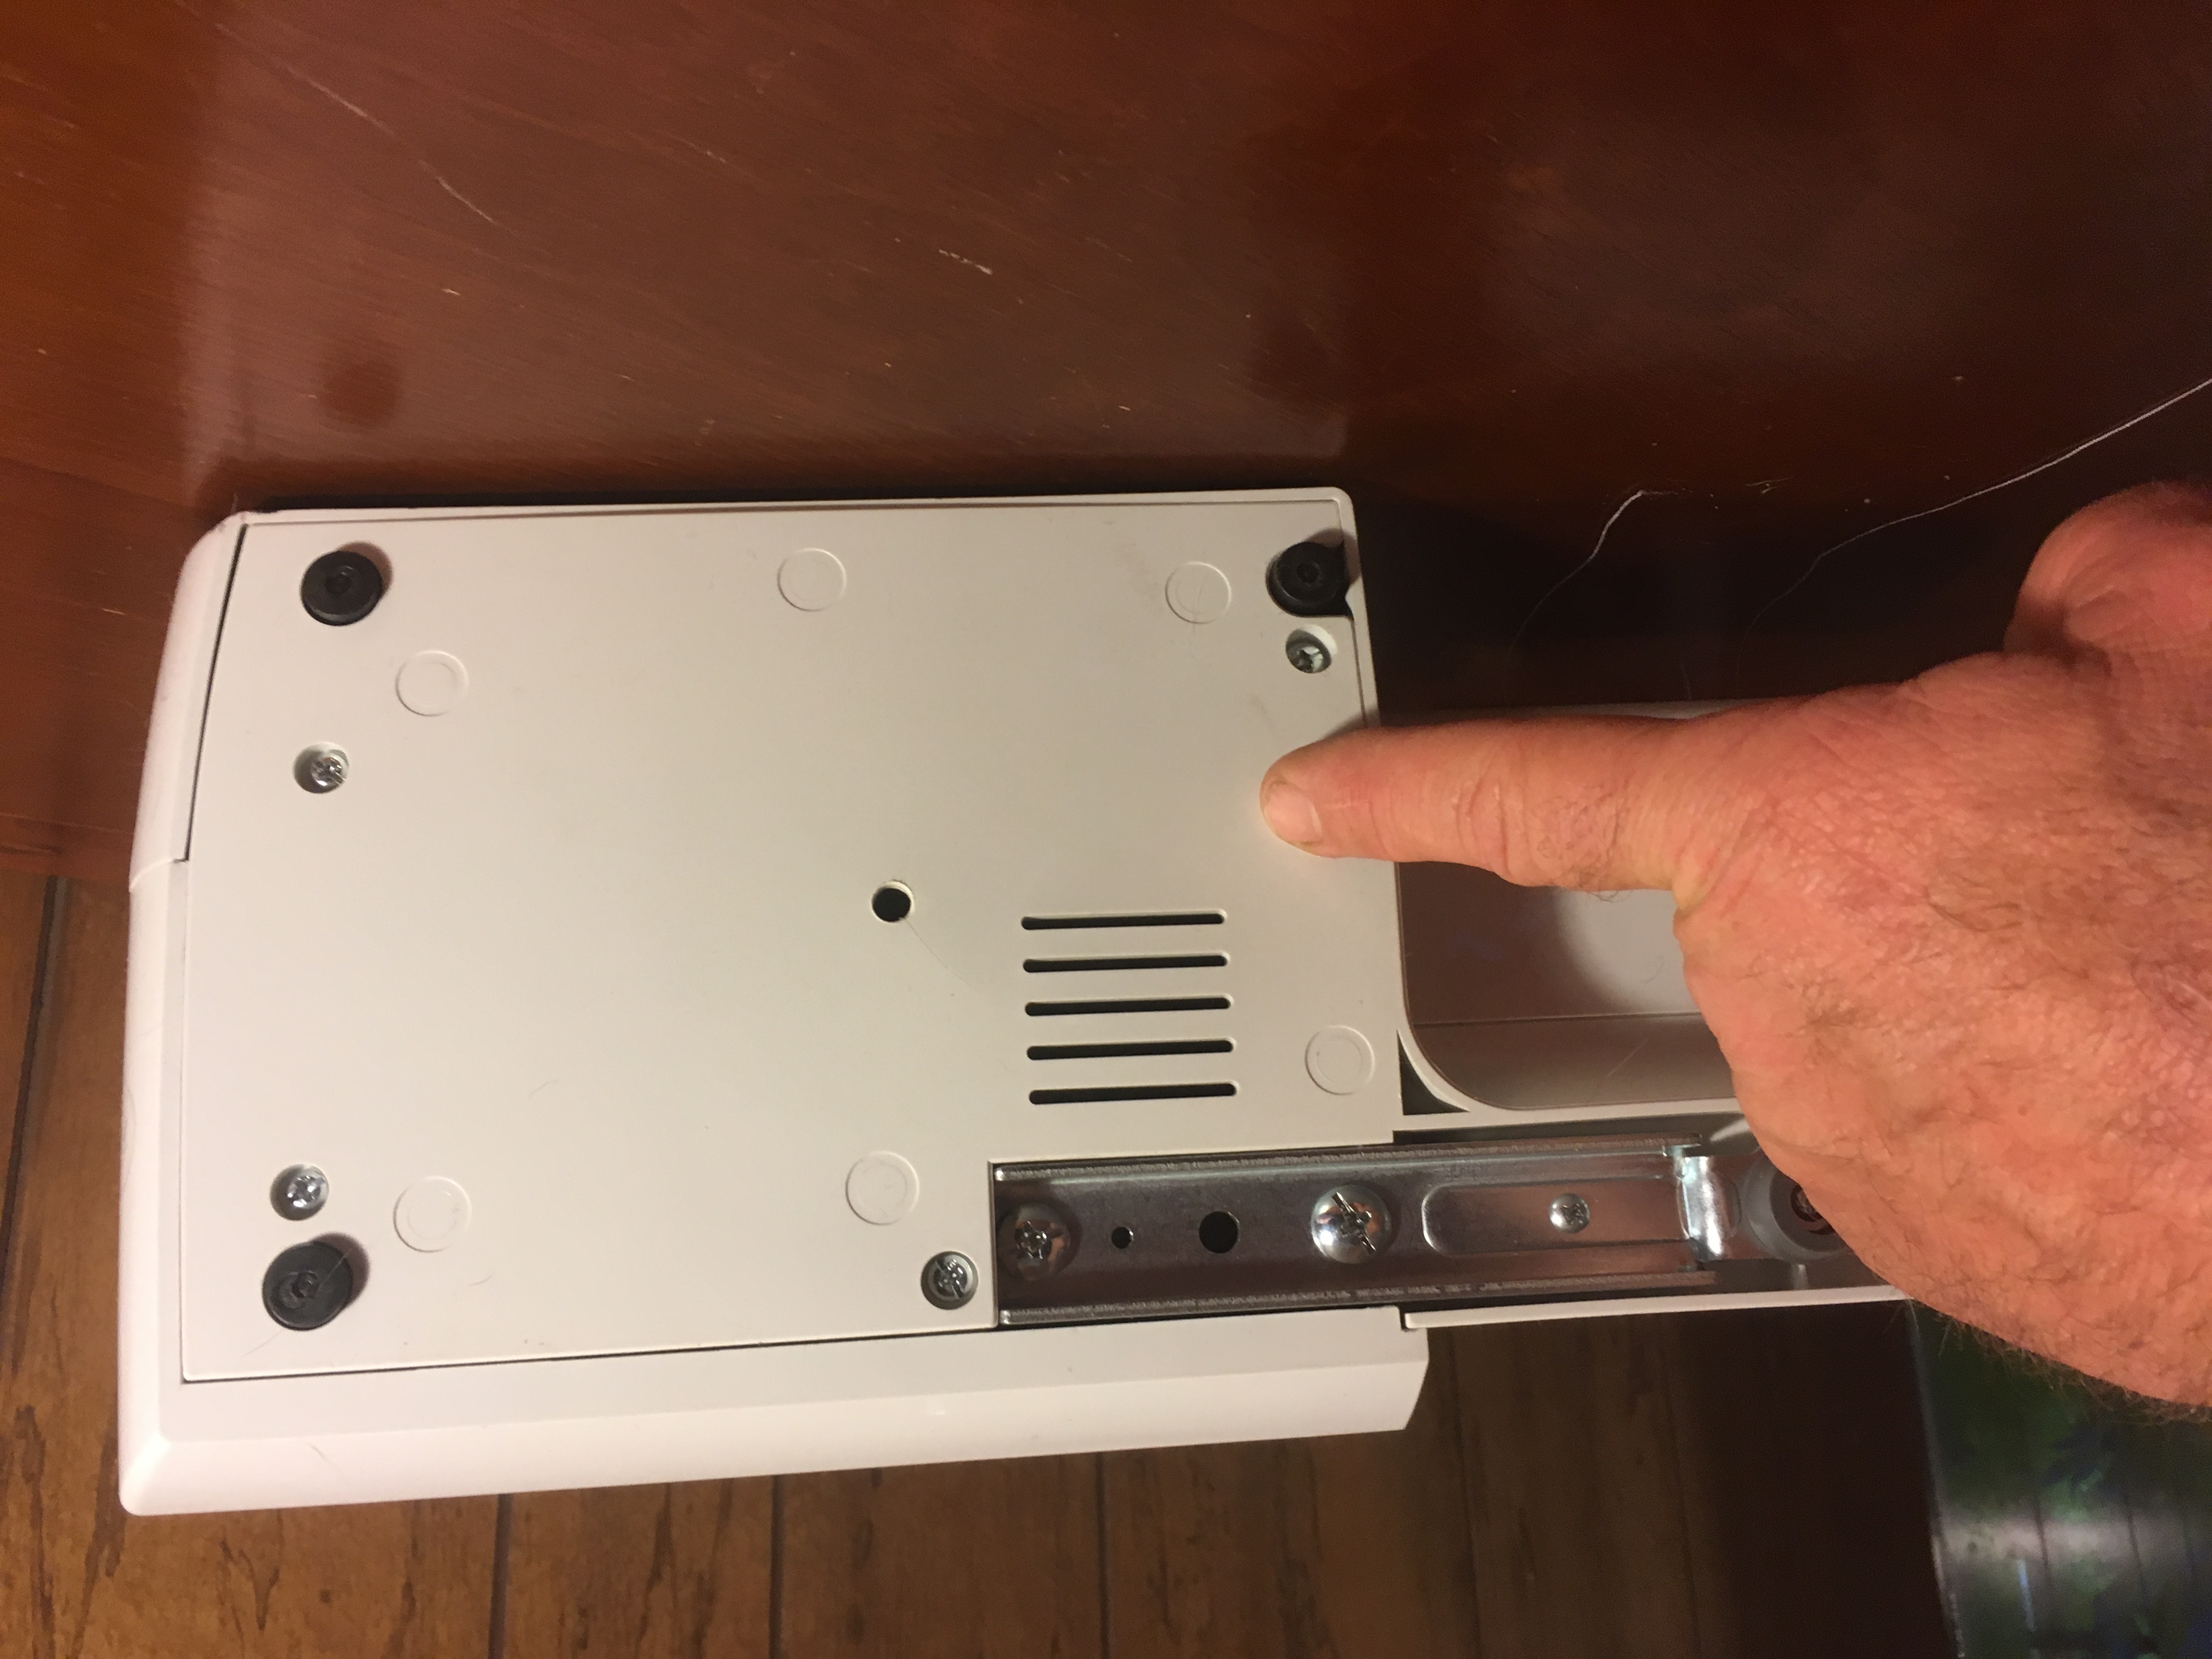
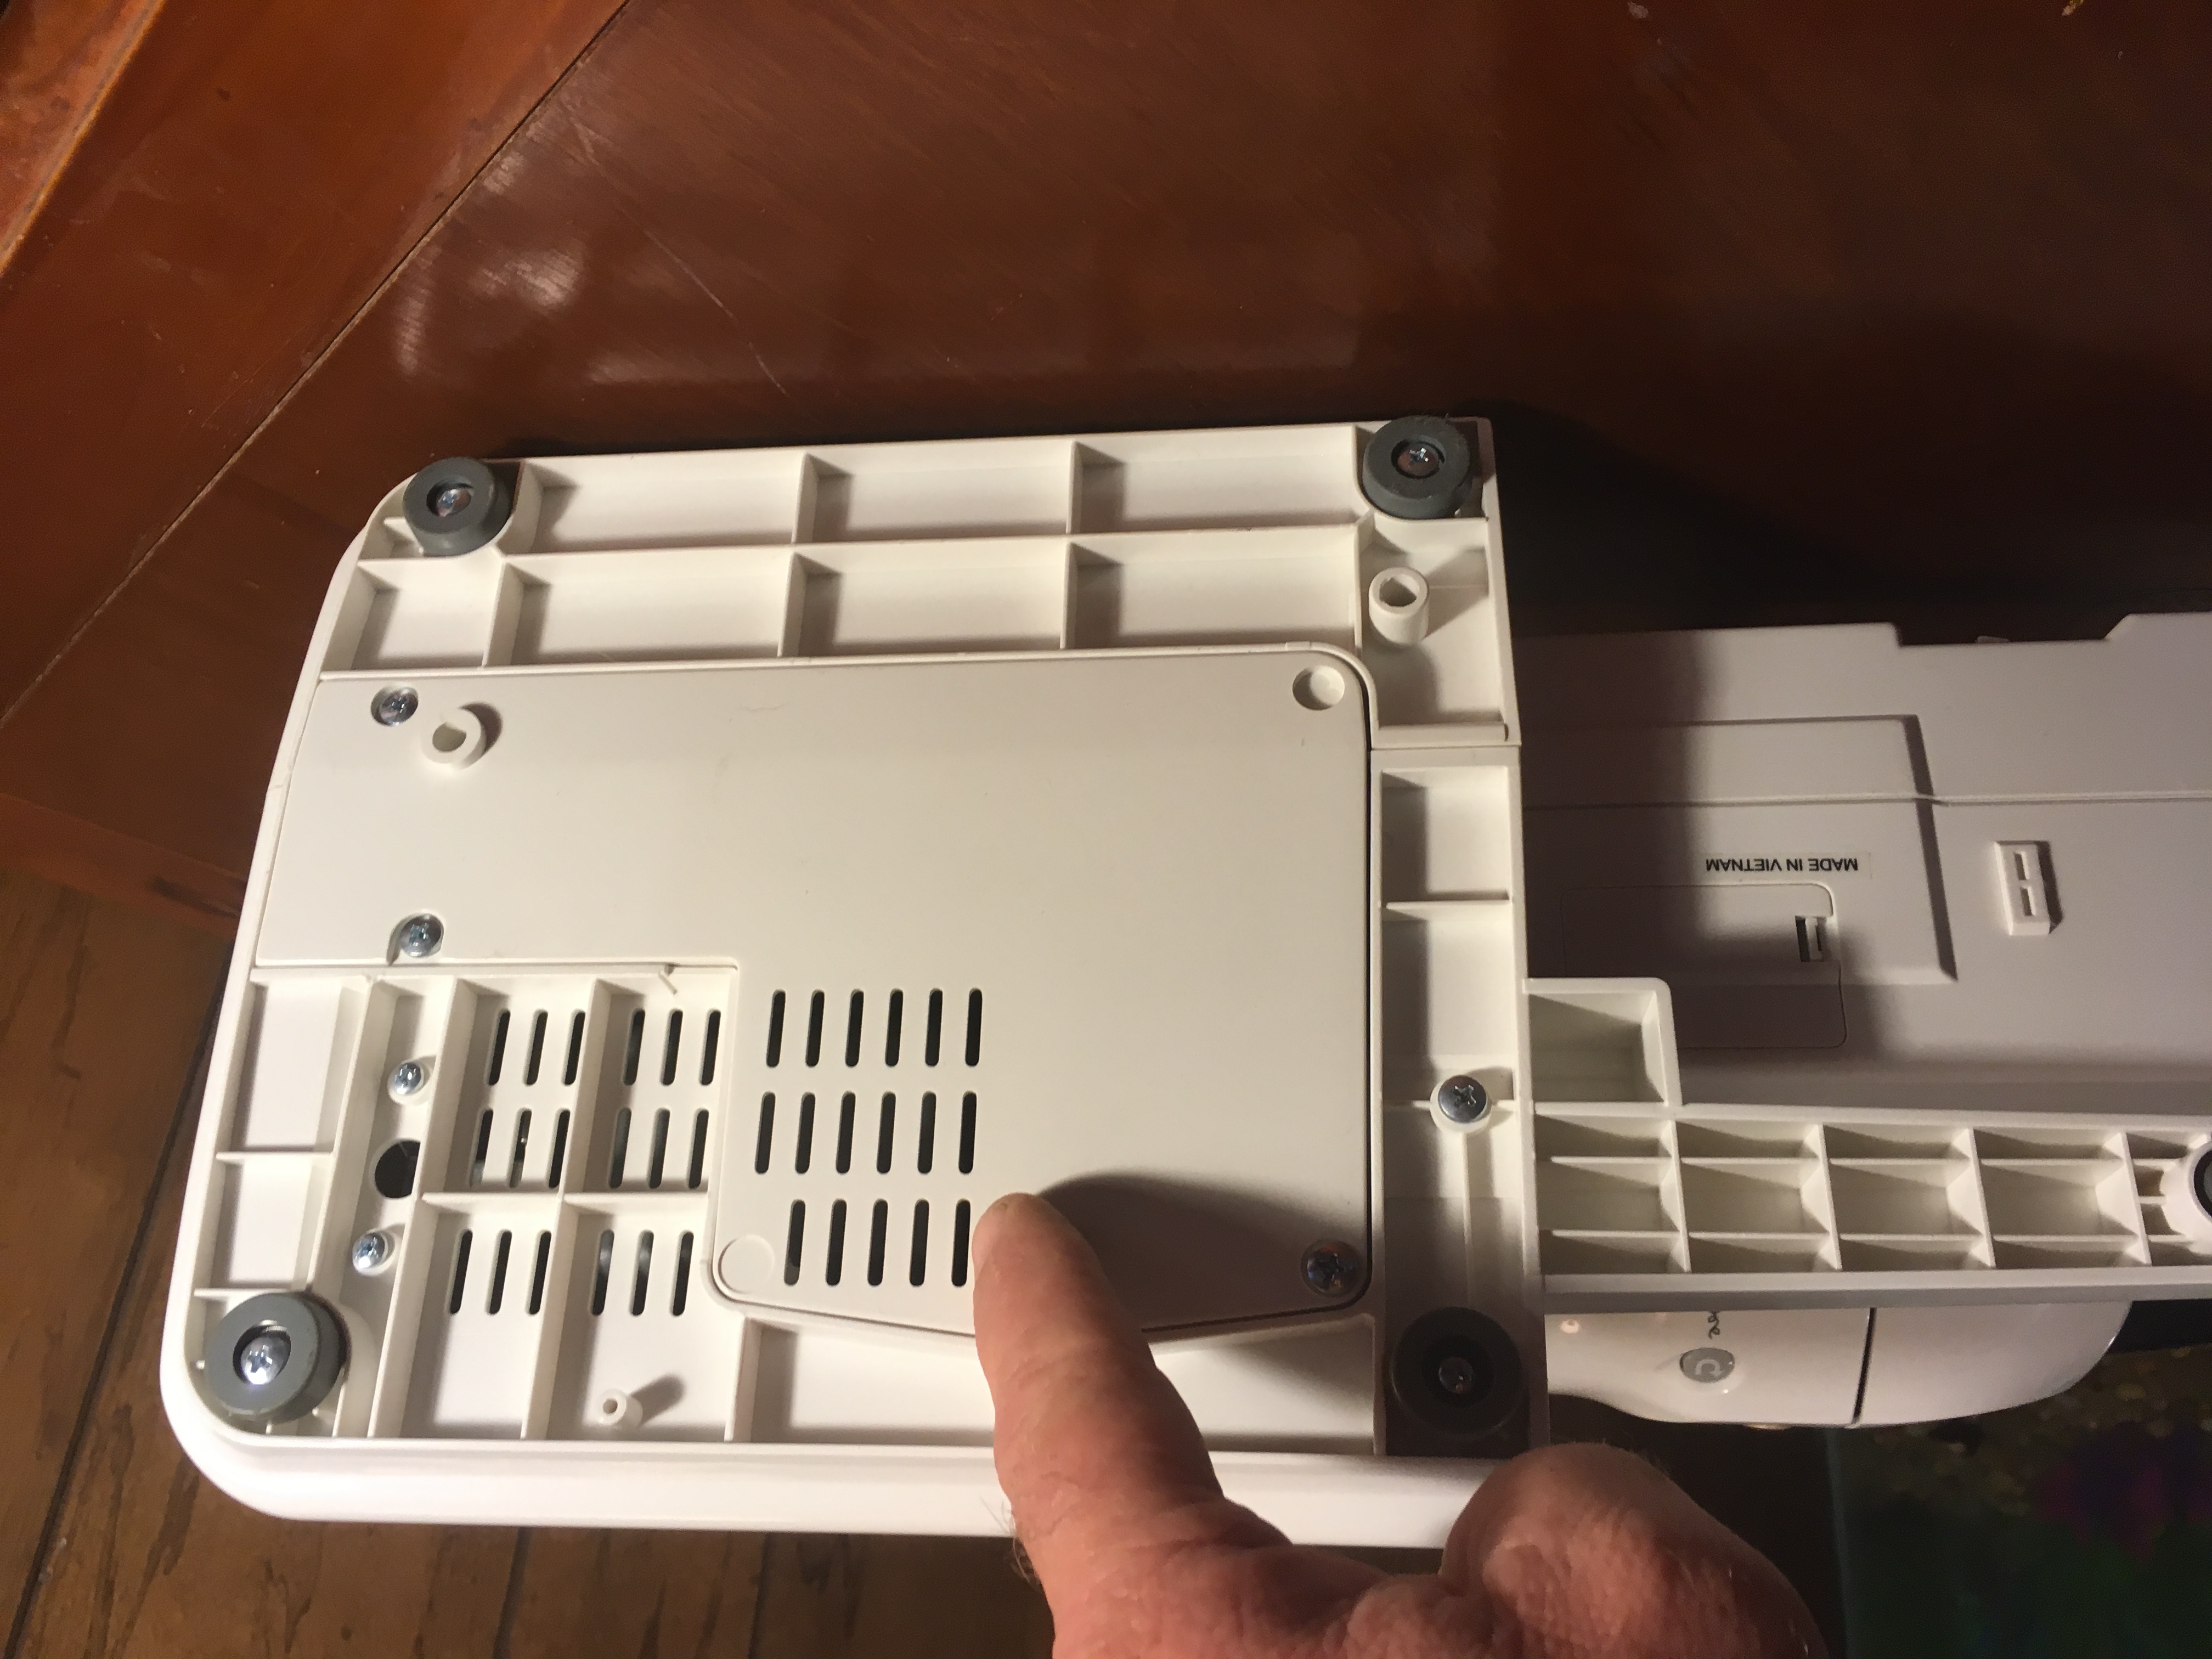
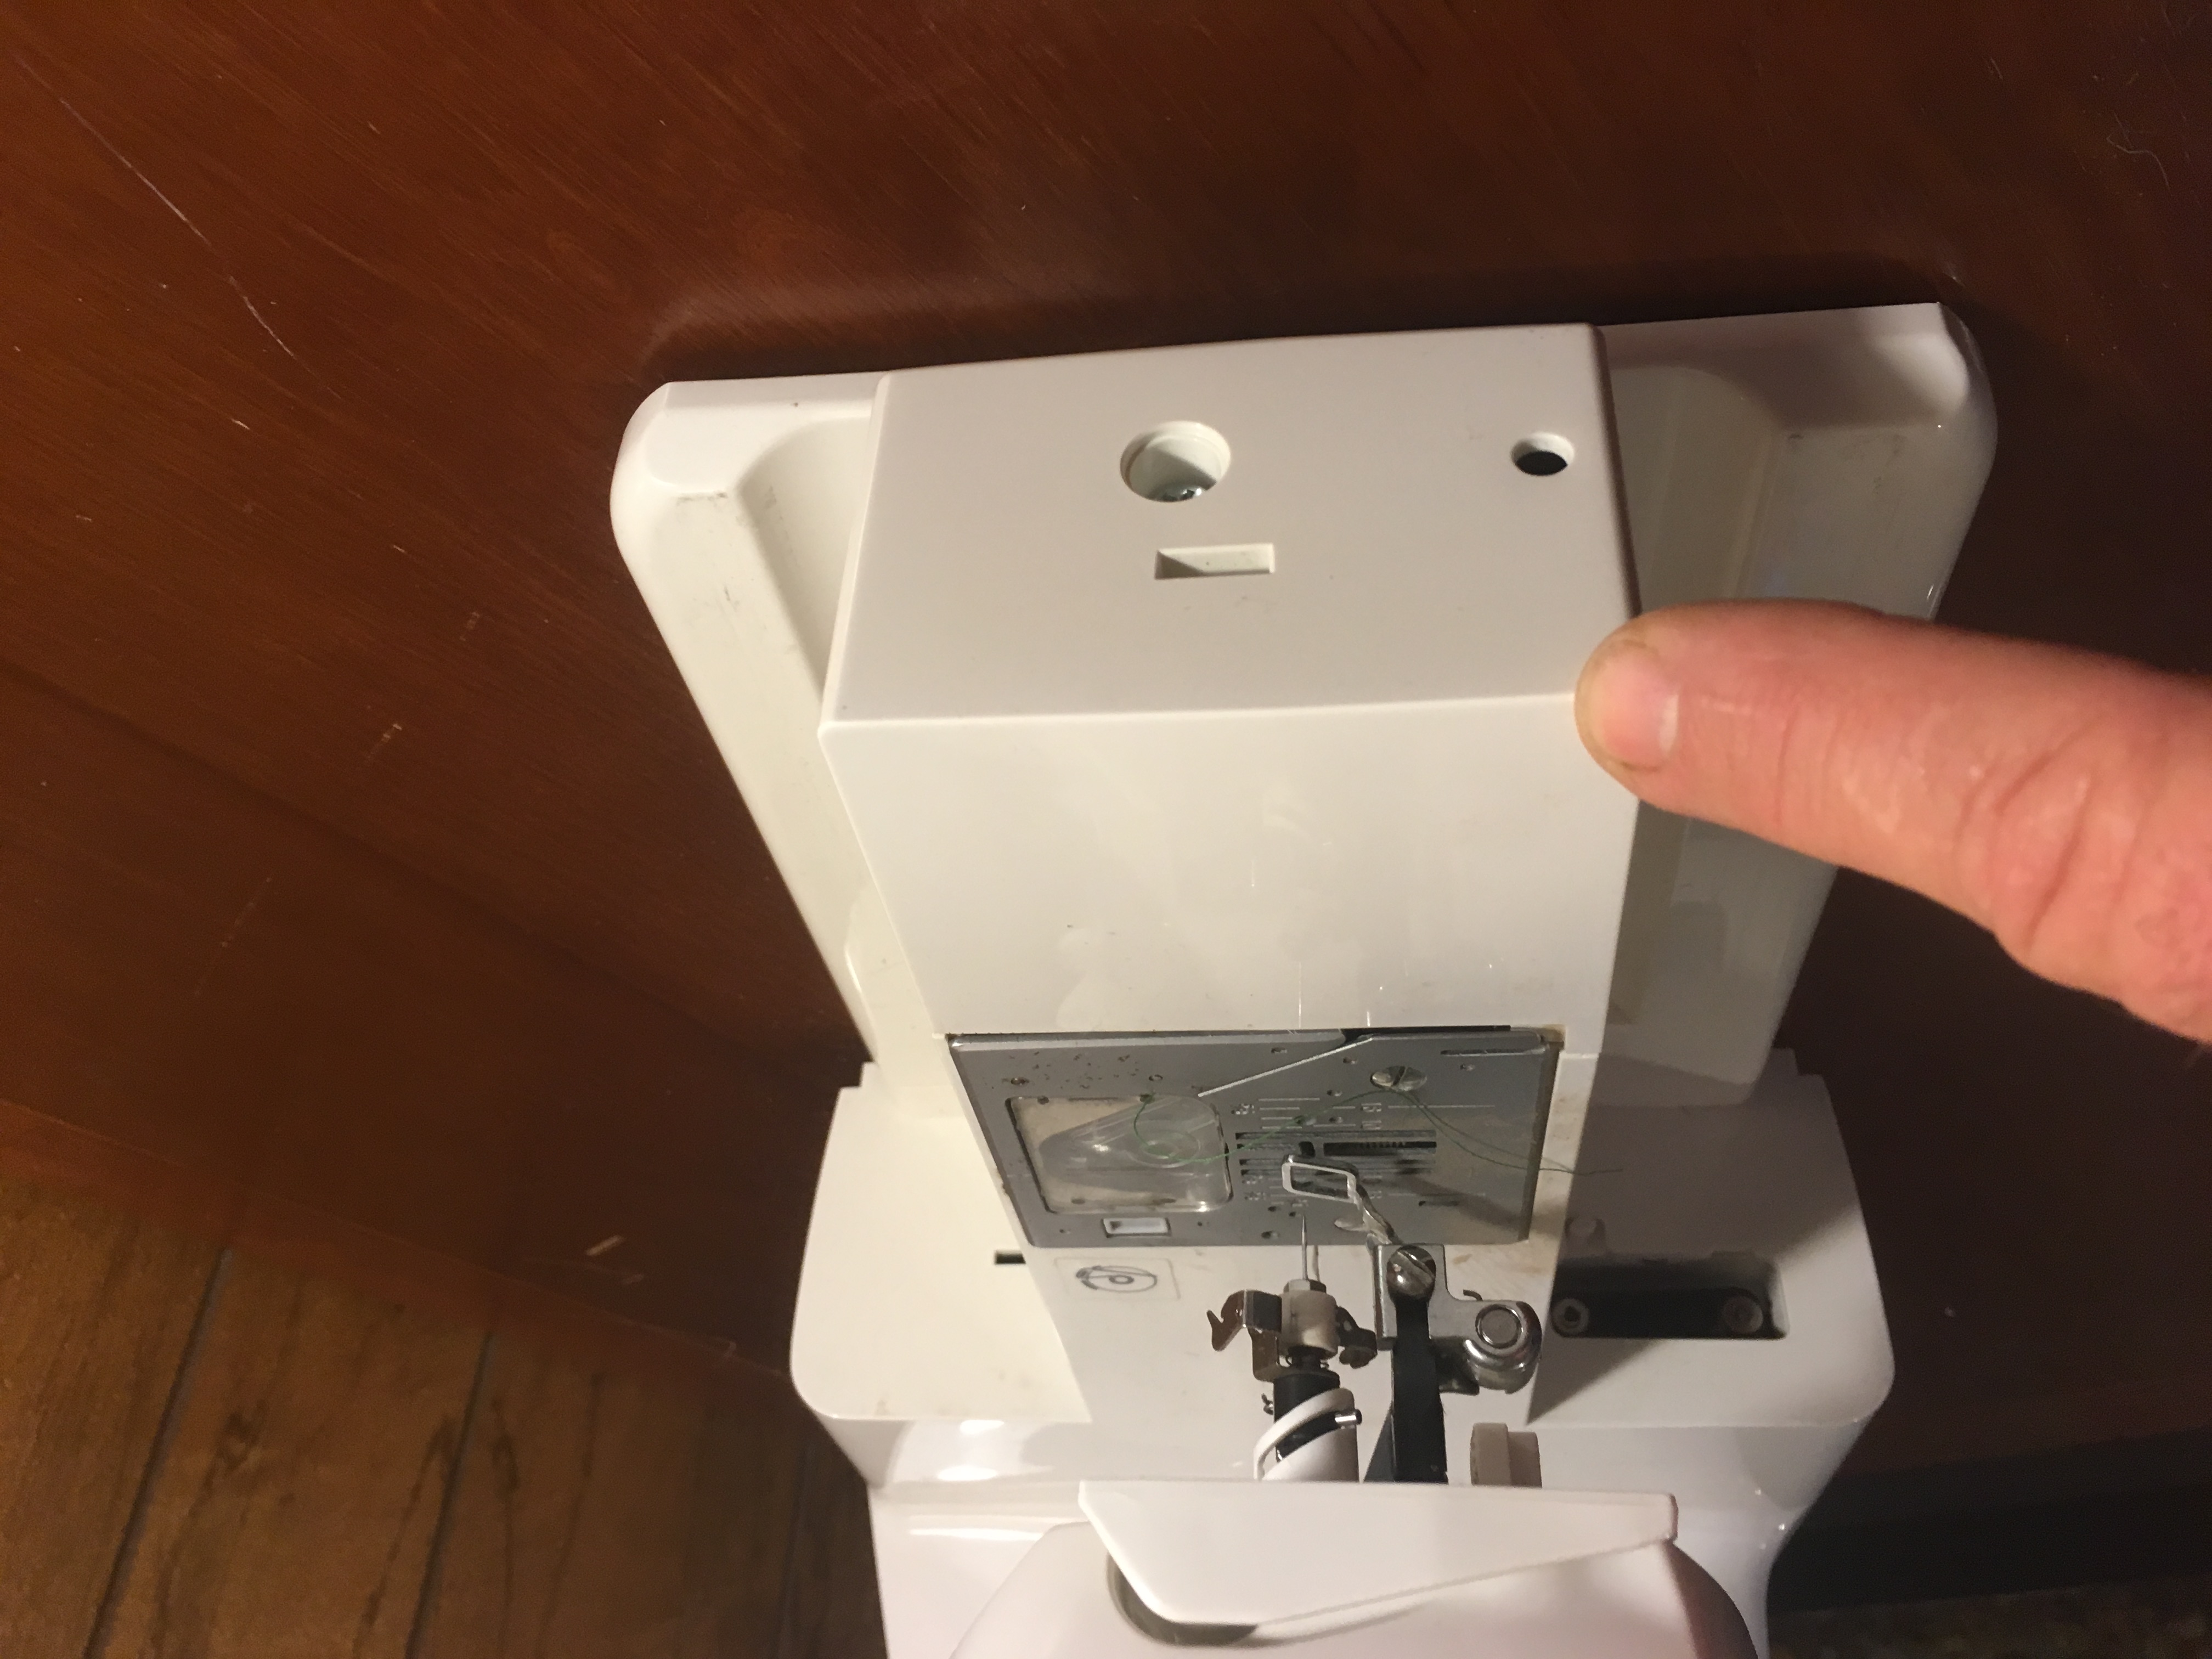
Here are examples of end and bottom covers to remove. Depending on your machine there may or may not be a cover that can be removed.
All lint and debris in the covers should be cleaned out and damage should be repaired. Minor damage to plastics can be repaired using super glue and/or epoxy, quick dry JB weld works well. Needle plates damaged by the needle can be repaired using a Dremel with a cone shaped diamond bit, bobbin cases and hooks can be repaired using 1000 grit or higher sandpaper or if the damage is to extensive replace the bobbin case or hook as needed.
You can use any or all of these methods, depending on your machine and what works best for you, the goal is to get all the lint or as much as possible out of the machine.
Using the vacuum and micro attachment set, suck as much lint as possible out of the needle bar area and the bobbin case/hook area. One of the brush attachments usually works the best. Using a small brush get into the small tight areas, loosen and remove any lint you can find. Slowly turn the hand wheel looking for hidden lint, thread and debris, remove it as it is found.
***SEE THE ABOVE CANNED AIR WARNING***
If you have been able to remove a cover, using the canned air blow any more lint found in unreachable areas out toward the opening of the cover you removed. Be careful it is blown out of the machine and not further in, lint can cause extensive damage to sewing machines.
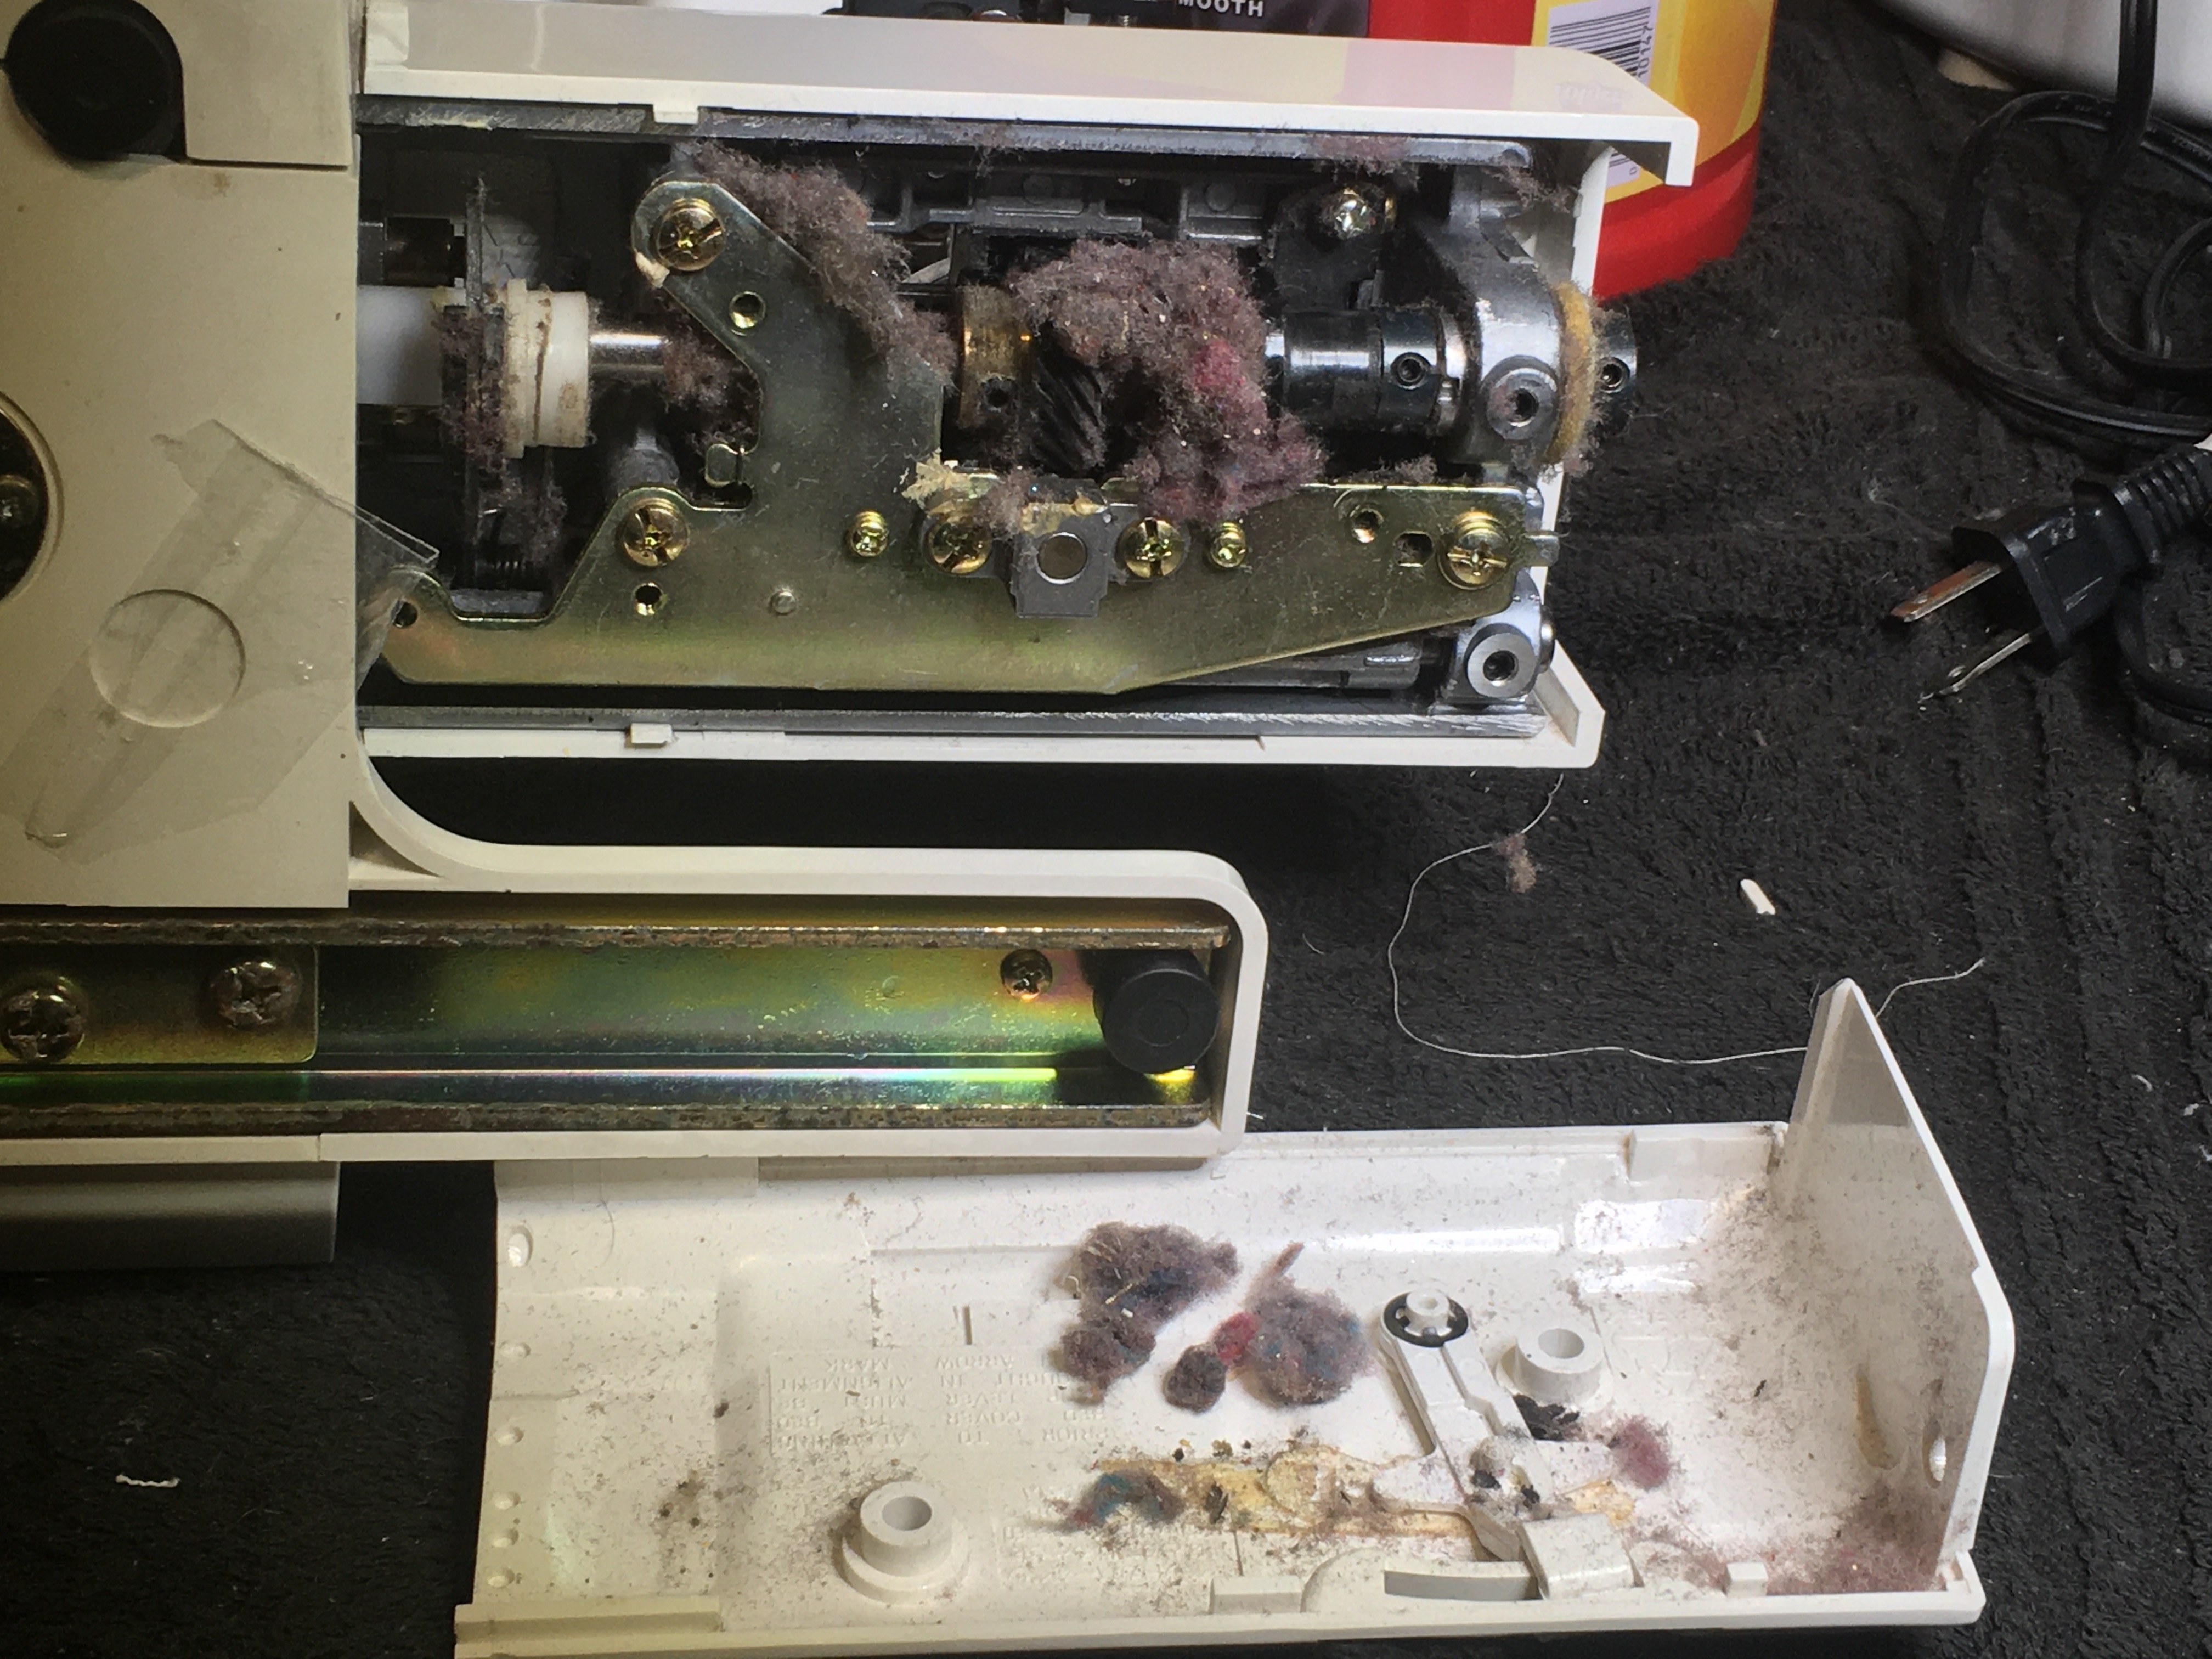
Clean out lint and debris of all covers you remove. Remove all the lint from the machine, it is very abrasive and can destroy any sewing machine that is not maintained.
???????????????????????Lubricate and Operate
Once all the lint is out of your sewing machine now you want to oil all moving parts, this serves two purposes. It provides lubrication helping to protect from wear and corrosion, it also moves trapped lint out of tight areas such as between the needle bar and needle bar guides. As you add oil to the different areas you will turn the hand wheel ensuring good lubrication and any stuck lint will start moving out, you will remove all the lint as it moves out of the crevices of your sewing machine.
If you have access to the needle bar area add oil to the needle bar both top and bottom just above each guide, one to three drops in each place then turn the hand wheel and monitor for lint moving out. Each machine is different but there are 2 - 5 more spot to lubricate. The take up lever and connecting linkage, pay close attention to the spot that connects the needle bar to the linkage assembly it will be directly behind the needle bar and usually a little difficult to see and access. Turn the hand wheel until the bar is as high as it will move just before it starts down again, this normally makes it easier to find and access the spot connecting the needle bar to the linkage.
Once you have the needle bar area well lubricated move down to the bobbin case hook area, with a top load bobbin you will see a pin in the center of the hook. Most of these sewing machines have a lubricating hole in the center of the pin, fill that hole with oil turn the hand wheel until the oil level goes down and fill it again. if there is no lubricating hole then put a couple drops on the outer edge of the pin turn the hand wheel a few times and add a couple more drops. If your machine is a front or side load bobbin there should be a place to oil the hook shaft as it goes through the frame. If not put a couple drops on each side of the frame where the shaft protrudes, you may not be able to actually see the shaft but only a washer or two, put the oil on the washers and turn the hand wheel it will seep in. On front and side load bobbin machines the hook is removable and has a hook race it fits and turns in put a couple drops in that race and turn the hand wheel.
Those are the critical areas to lubricate, you can add oil to other moving parts you have access to if you wish such as feed dog hinges, edge of thread cutter, gears or anything that moves or rotates with close tolerances.
???????????????????????????????????????
Repair or Replace
If you have not made the necessary repairs needed from your inspection then you need to do that now before you put your machine back together.
Broken and damaged parts will get worse, damaged needle plates, bobbin cases and hooks will continue to cause problems and your sewing machine will not sew correctly until the damaged pieces are repaired or replaced. Here is the paragraph from above again to help you make the repairs.
All lint and debris in the covers should be cleaned out and damage should be repaired. Minor damage to plastics can be repaired using super glue and/or epoxy, quick dry JB weld works well. Needle plates damaged by the needle can be repaired using a Dremel with a cone shaped diamond bit, bobbin cases and hooks can be repaired using 1000 grit or higher sandpaper or if the damage is to extensive replace the bobbin case or hook as needed.
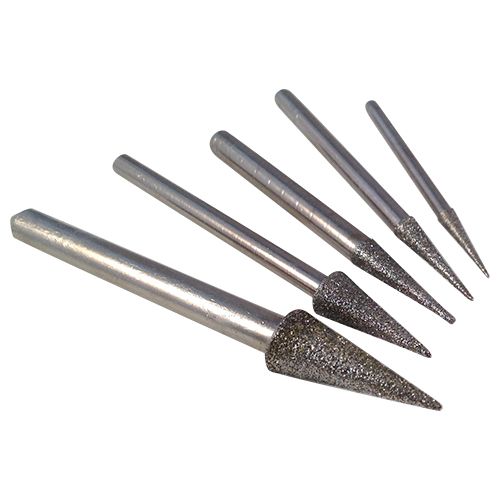
Examples of bits that work well on needle plates.
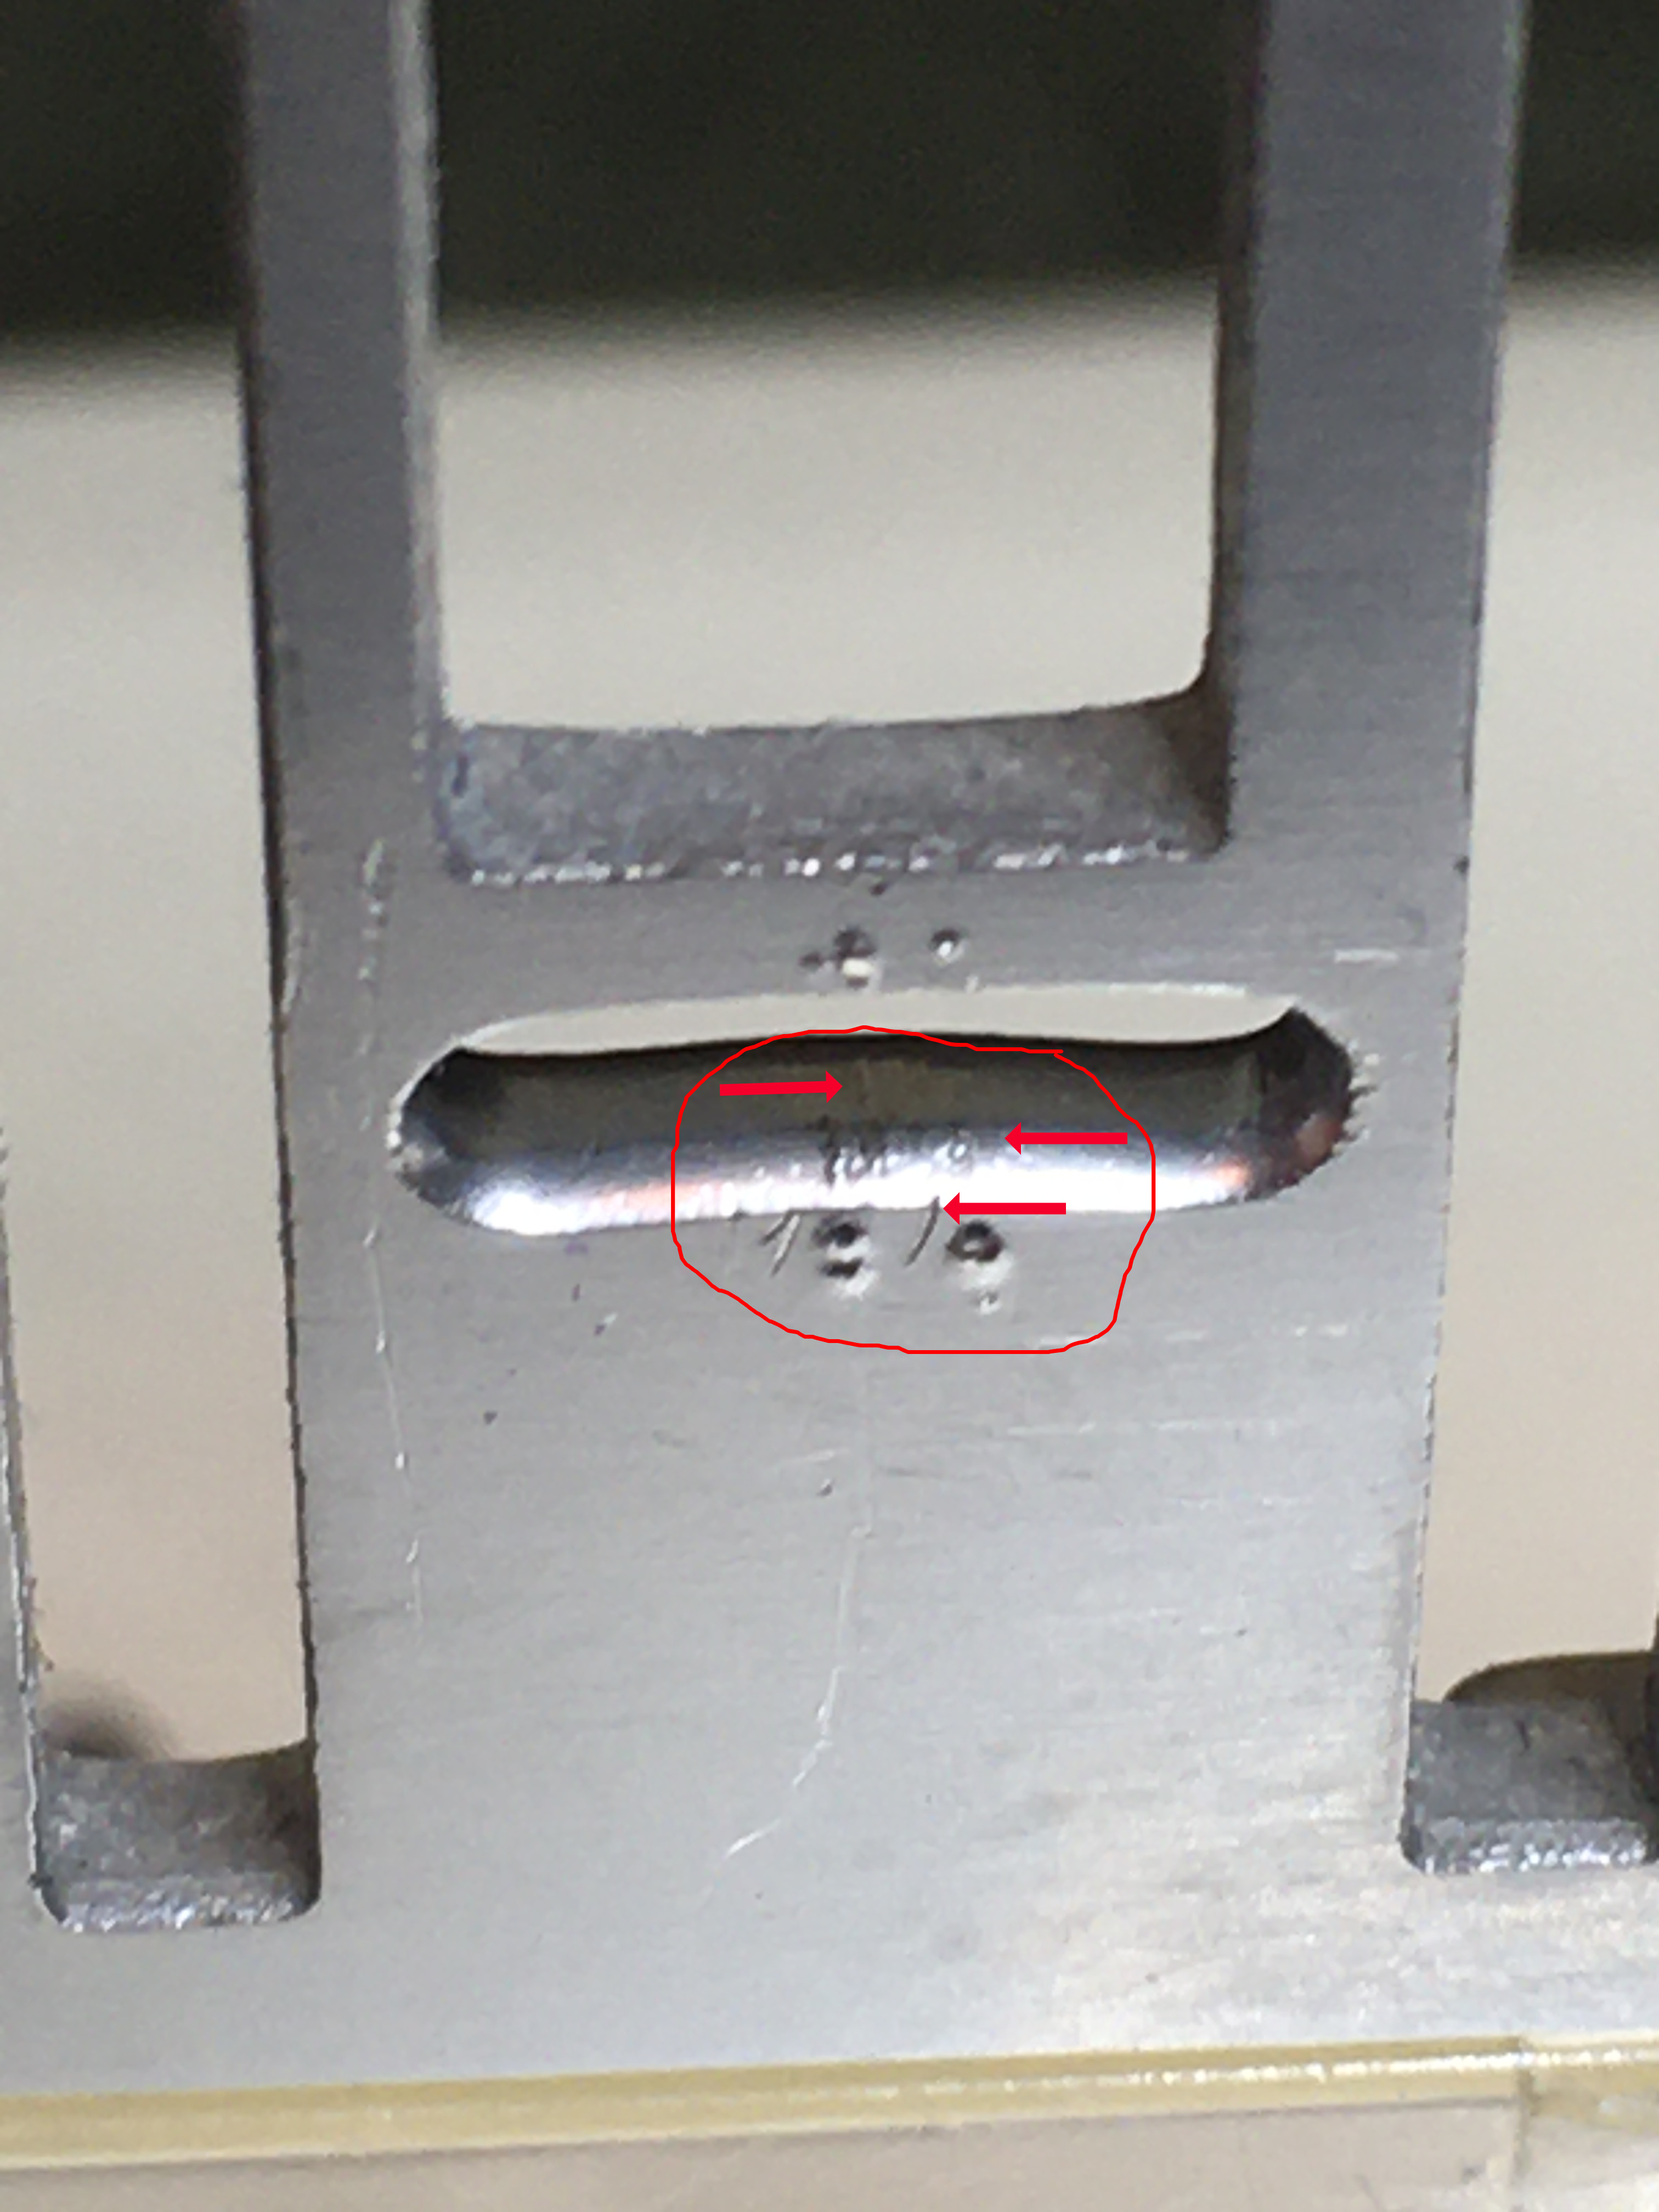
All damage inside the needle entry area must be removed, it can catch the thread.
If the damage is to extensive then the part will need to be replaced, You can find a great supply of parts at Sewing Parts Online. They have a large supply and are very knowledgeable and helpful.
???????????????????????????????????
Reassemble
Once your sewing machine is clean, lubricated and parts repaired or replaced then you can reassemble your machine. Pay close attention ensure all the covers properly fit together, don't force anything as the plastic can break easily. When reassembled test the machine to ensure it properly works.
The secret to keeping a machine sewing and in great shape is proper use and care. Any sewing machine not properly threaded, improperly used or cared for is doomed for costly repairs. Keep your machine properly sewing, avoid common problems and costly repairs with our complete guide to sewing machine use, care and small repair

